How to Setup Seamless Premium Content Delivery for Compliance Audits & Remediation

Chef Premium Content delivers curated content for compliance audits and remediation based on the Center for Internet Security (CIS) certified benchmarks and Defense Information Systems Agency (DISA) Security Technical Implementation Guides (STIGs). Chef
offers premium content for operating systems, databases, web server applications, cloud and container systems, and other applications.
In this blog, we explain:
- How to run an audit on a target node
- How to run remediation on a target node
- Accessibility of audit and remediation content
Setting up the Environment
Install Chef Workstation
A collection of developer tools enables devices in your fleet to interact securely with your Chef Server. This includes Chef Knife, Chef InSpec, Cookstyle, Chef Habitat, and Test Kitchen. Ruby and other dependencies are also included, so you don’t have to install anything else to start with all the Chef tools.
Prerequisites
Steps for running an audit on a target node
To audit a raw node by specifying and scanning a profile, select a benchmark from the listed profiles under the Compliance tab. In this example, you have an Ubuntu raw node, so filter and select Ubuntu from profiles based on its version.

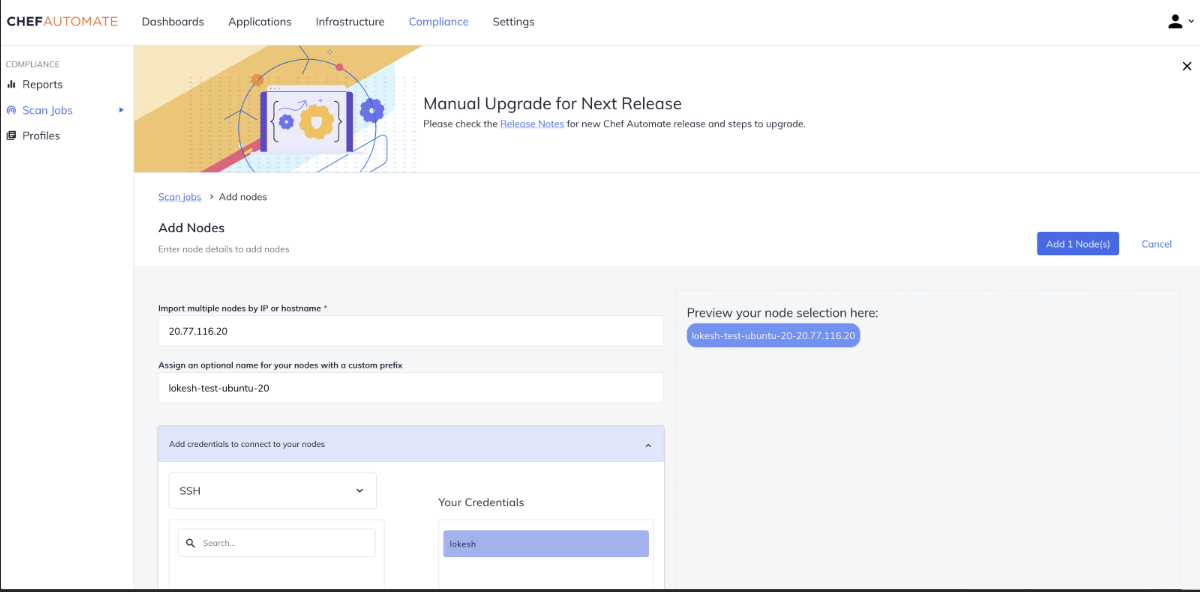
Once you have selected the profile based on the operating system, you can add and scan the node. To do this, under the Nodes added section, fill in the remote node IP address with an optional name for your node. Next, select the credential
file to validate and click on add node.

In a few seconds, you will see whether this node is in a reachable or un-reachable state. The client node will be unreachable if the wrong credential file is selected and sent across server.
Next, scan the node with the selected profile. Give specific naming conventions for the generated reports and click on Save. When the status changes to "completed," you can view detailed information under "Failed and Passed Controls."
Information about the node will be available in the Report section under the Compliance tab, report section. In addition, you can view the detailed report under "Failed and Passed Controls." Information about the node IP, platform details, Scan
details, etc., is also available.
After the scan, note the control that has failed and passed. These are the results from the scan using the Center for Internet Security (CIS) or Defense Information Systems Agency (DISA) audit profiles.
Steps for running remediation on a target node
Download the remediation content based on your machine information. In this example, you will have to download Ubuntu remediation content since it is an Ubuntu a raw node.
Once downloaded, unzip the file, copy the content inside the folder, and paste it into the cookbooks folder in Chef Workstation.
Upload the cookbooks to Chef Server through this command from workstation
“Knife cookbook upload remediation_cis_ubuntu20_v_1_0_0”
Bootstrap the node (target) from Chef WorkStation
knife bootstrap 18.212.213.148 -N awsubuntu -U ubuntu --sudo -
i ~/Desktop/akshay.pem
Here, “18.212.213.148” is the client node IP address, “awsubuntu” is the naming convention given to the node, and ubuntu is the machine name.
In the screenshot below we can see the added node under the infrastructure tab.
You can search for the added node using the command knife node list. You can also verify the nodes by looking at the Automate dashboard.
Add the run-list “Cookbook name” to the node with the command
knife node run_list add <node_name> ‘recipe[<cookbook name>]’
Uploaded cookbook successfully – From Workstation to Server
Once the cookbook has been uploaded to the server, login to a remote client and run
sudo chef-client
ssh -i "akshay.pem" ubuntu@ec2-172-31-56-
155.compute.1.amazonaws.com
When the chef-client execution is completed, perform an audit
scan again on the remote node with the same profile but with a different naming convention. This will make it easier to differentiate the two scans when analyzing the result of the remediation.
After the scan, you'll see a drastic fall in error rates under failed controls and an increase in the number of passed controls. This is because the remediation cookbook has fixed the controls failing in the initial scan.
Before executing remediation, cookbook there were 86 failed Controls.
After executing remediation cookbook, the number of failed controls fall to 48.
We were able to automate the remediation of 38 controls using a remediation cookbook.
Conclusion
Learn more about Chef Premium Content
Enterprise customers can reach out to their respective customer success managers, customer architects or technical support team for any clarifications.