Cloud security is a collection of procedures and technology designed to address external and internal threats to business security. The organization needs cloud security as it moves toward its digital transformation strategy and incorporates cloud-based tools and services as part of its infrastructure. Chef progress is the leading platform and the first provider certified by CIS for all the major cloud providers.
Chef Cloud Security allows you to scan, monitor, and suggest remediation in your multi-cloud accounts across on-prem and cloud-native environments. Maintaining and enforcing security for containers and clouds with the standards-based audit is easier than ever. You can tune baselines to adapt to the organization’s requirements and maintain visibility and control across hybrid environments.
Chef Cloud Security provides visibility through streamlined audits, maintaining continuous compliance, CSPM and Cloud-Native security, and a coded approach.
Setting up your Environment
Azure API Keys:
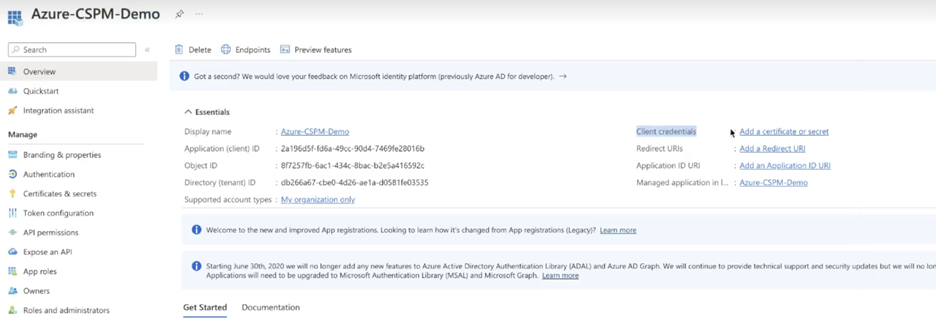
To integrate Azure cloud, you first need to create a Client ID and Secret key within the Azure account. To begin
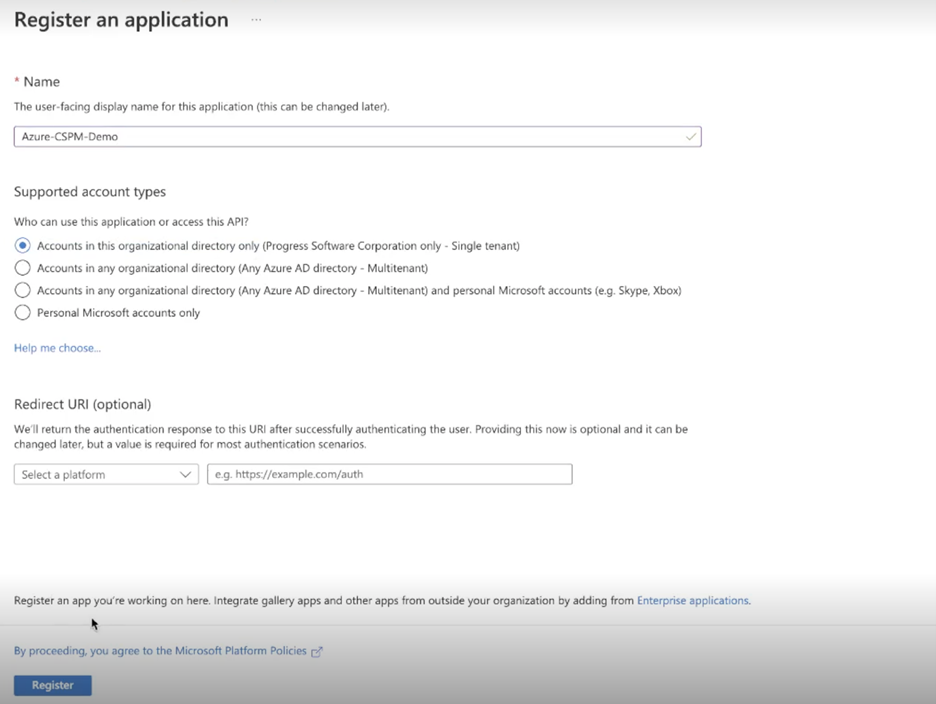
- Log in to the Azure console, scroll to the Azure Active Directory and select App registrations under the Manage section.
- Choose “new registration.”

- Provide the display name for the new application.
- Select the option which best describes your infrastructure and click on register.

- Once the application is created, click "create credentials" and then new client secret.

- Provide the description and the expiration date for the key.
- Download or copy the secret key and save it securely.
Note that every user in an account will have a unique Tenant ID.
You can set up Cloud solutions in Chef Automate in three simple steps.
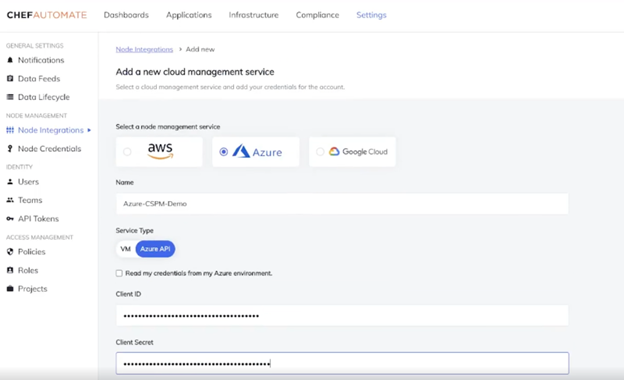
To start, you first need to connect your cloud-native environment (Azure) to Chef Automate UI.
- Click on Settings.
- Node Integration > Create Integration.
- Select Azure from the given options.
- Give a valid name for your cloud management service.
- Fill out necessary details concerning Azure keys.
- Save Integration.

Note that the node's status should always be reachable when you save your integration.
The next step is to select the security profile you want to apply to your Azure node.
- Click on Compliance
- Profiles > Available profiles > Search for Azure Benchmark
- Click on Get
- The selected security profile should now be visible under the profiles section
With the profile selection and node integration completed, you need to create a scan job that will scan the selected cloud nodes based on the security profile.
- Click on Compliance
- Scan Jobs > Create Scan Job
- Select the Cloud node
- Select a Profile
- Run the Scan job
You can also schedule the time and date for scanning your cloud environment.
Each control file from the security profiles goes through your cloud account and checks for misconfiguration based on benchmarks and best practices as per CIS.
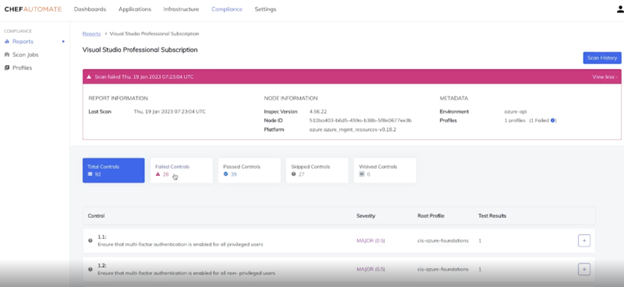
To check for the results of the scans.
- Click on Compliance
- Nodes
- Search and Click for the name of your test

You can view detailed results of the scanned node under each test.
You can download the compliance report in CSV or JSON format. You can integrate any third-party tool like ServiceNow and Splunk within the Automate UI and export the data. In addition to all these features, Chef also provides APIs for external support.
Get more details of Chef’s Cloud Security Management here.
Watch the Technical Demonstration here.
Technical blog on Chef Cloud Security for AWS cloud.

