Enterprise Chef 11.2.0 includes oc-id, the OAuth2 service that powers id.opscode.com. After upgrading to this release, Chef customers can run their own Supermarket service behind a firewall.
oc-id setup:
1: Add the following setting to your /etc/opscode/private-chef.rb configuration file and then run ‘private-chef-ctl reconfigure’:
oc\_id['administrators'] = ["boiardie"]
This must be an Array of Enterprise Chef users who are authorized to manage the oc-id service. An extended list of oc-id related options for private-chef.rb is available on the docs site.
2: Log in to your Enterprise Chef server’s oc-id management portal at https://mychefserver/id and you will be directed to the oc-id authentication page. Log in as an administrative user as defined in step 1, and you will be displayed
a screen showing that you don’t have any authorized applications:

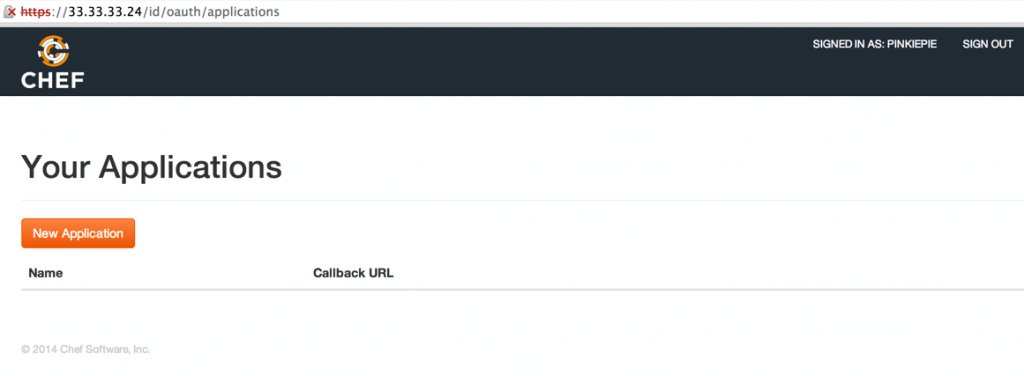
3: Change your URL to https://mychefserver/id/oauth/applications (sorry, there’s no button or link to do this yet) and you’ll see a screen to add/manage applications:

NOTE: Applications in this context refers to OAuth2 client systems that will authenticate against the oc-id service (like Supermarket).
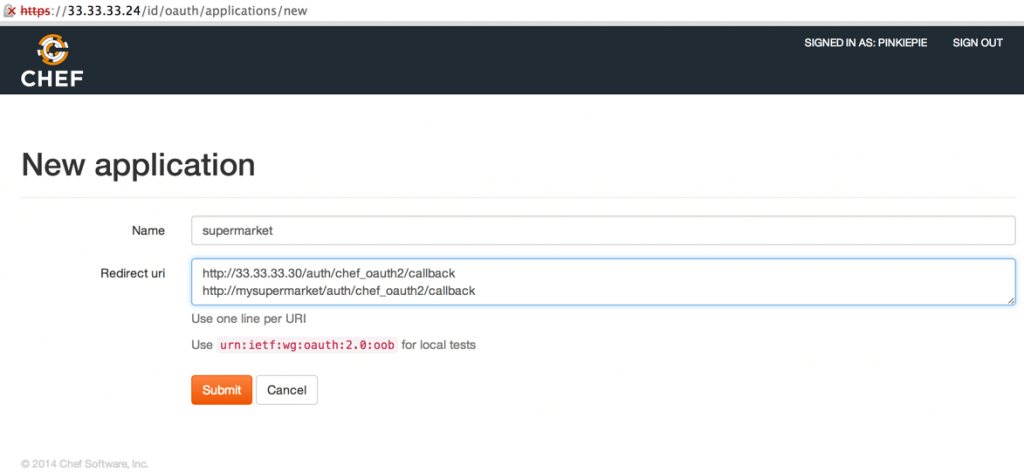
4: Click the New Application button and fill in the application name and Redirect url:

NOTE: the Redirect URL must contain the oauth2 callback URL, which is /auth/chef\_oauth2/callback for supermarket.
NOTE2: If your users access the supermarket server by different URLs please note those here.
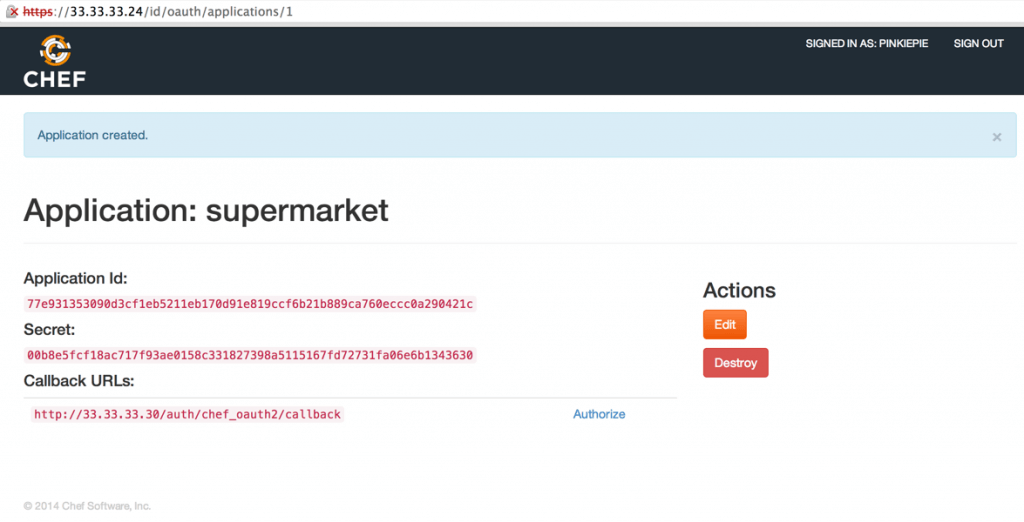
5: After you click Submit you will be shown the Application Id and Secret strings which you must supply to Supermarket. Copy these down, but don’t worry about losing them. You can always retrieve them from the /id/oauth/applications URL of your Chef server.
Supermarket setup
Currently Supermarket does not have an Omnibus package and must be configured using the supermarket cookbook. These instructions will use test-kitchen to setup your Supermarket instance in Vagrant.
1: Download the supermarket cookbook, double-check the settings in the .kitchen.yml; particularly the private_network IP address:
git clone https://github.com/opscode-cookbooks/supermarket.git supermarket-cookbook
2: Edit the chef\_oauth2 section of the data\_bags/apps/supermarket\_prod.json file. Note that the url field is the URL of your Chef server without a URI.
"chef\_oauth2": {
  "app\_id": "14dfcf186221781cff51eedd5ac1616761b31e8947e51f28232537313c5c9c40",
  "secret": "a49402219627cfa6318d58b13e90aca164aad2e263fb8f05b766e01f97450c1d",
  "verify\_ssl": false,
  "url": "https://mychefserver.example.com"
},
3: Fire up your supermarket instance
kitchen test --destroy=never default-ubuntu-1204
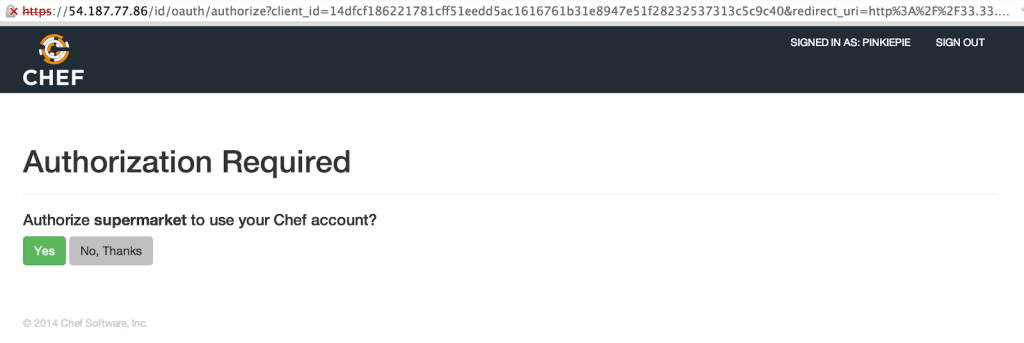
4: Once running navigate to http://33.33.33.10 and log in to your new Supermarket instance. You will see a request to authorize the application. This only needs to happen once.

5: Success! You should be logged in to your Supermarket server as the requested user.
oc-id Caveats as of EC 11.2.0
- There is a known issue with Supermarket that it verifies the SSL certificate of the oc-id server and this setting cannot be overridden (workaround
provided).
- When this happens (at application authorization time) users will only be displayed a generic “something went wrong” error message.
- There is no link to the application management interface in oc-id, you must enter it manually.
- If you are not logged in as an oc-id administrator, the application management URL will display a 404 “Page Not Found” error instead of a 403.
- Many of the links in Supermarket will take you to manage.opscode.com instead of your Chef server

